
A greasy kitchen floor not only jeopardizes safety with its slippery surface but also undermines the overall cleanliness and visual appeal of your home. In this all-encompassing guide, we embark on a journey through the intricate nuances of efficiently cleaning a greasy kitchen floor, promising a space that gleams with both cleanliness and safety for your culinary exploits. We’ll navigate through the intricacies of various kitchen flooring types, deciphering the unique challenges each presents in the battle against grease. Furthermore, we’ll unravel the scientific mysteries behind, shedding light on its composition and the reasons it stubbornly clings to surfaces. Armed with this understanding, how to clean a greasy kitchen floor you’ll gain insights into not only the problems posed by a greasy kitchen floor but also the solutions and preventive measures required to transform it into a pristine haven that reflects both hygiene and aesthetic excellence.
Understanding the Enemy: Types of Kitchen Flooring
Tile Flooring:
Tile flooring is a popular choice in kitchens, known for its durability and aesthetic versatility. Common types include ceramic, porcelain, and natural stone tiles. Despite its advantages, tile is susceptible to accumulation, especially in grout lines and textured surfaces. The challenges arise from the porous nature of grout, which readily absorbs grease, leading to discoloration and an unsightly appearance. Regular cleaning is essential to prevent long-term damage and maintain the pristine look of tile flooring.
Vinyl Flooring:
Vinyl flooring is favored for its affordability, resilience, and ease of maintenance. However, can adversely affect its texture and appearance. The vinyl surface may become slippery and lose its shine as it infiltrates its porous layers. Understanding the impact of vinyl is crucial for developing effective cleaning strategies, ensuring the longevity of the flooring, and preserving its aesthetic appeal.
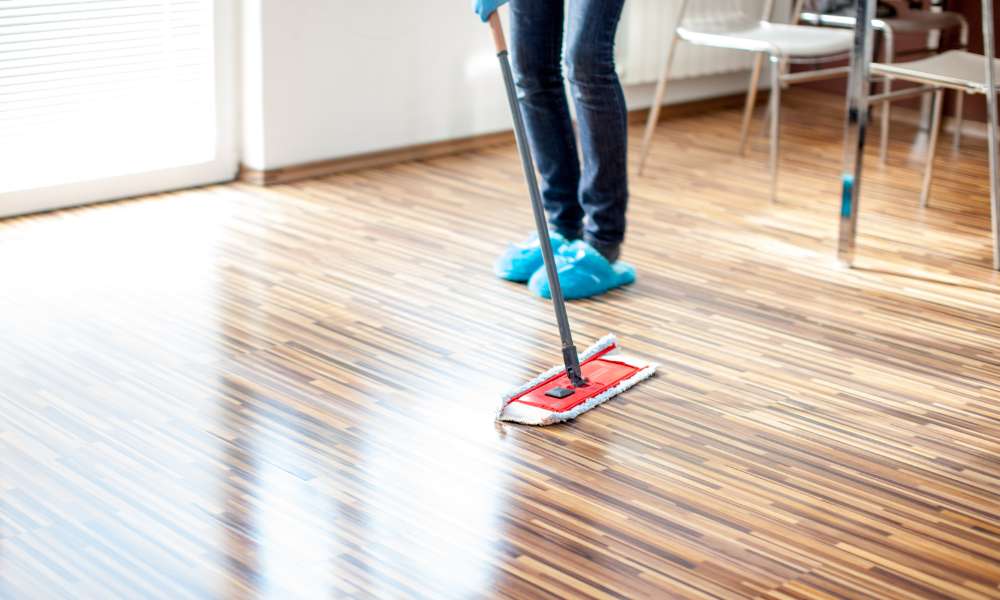
Hardwood Flooring:
Hardwood flooring exudes warmth and elegance in kitchens, but cleaning from such surfaces requires special attention. can seep into the wood, compromising its finish and causing stains. To combat this, it’s essential to promptly address spills and splatters. Regular maintenance, including sweeping and gentle mopping with a hardwood-friendly cleaner, is crucial to prevent buildup and maintain the natural beauty of hardwood floors in a -prone environment.
The Science of Grease
What is Grease?
Grease, in the kitchen context, is a byproduct of cooking oils, fats, and food residues. It is a semi-solid substance with a high viscosity, often originating from animal or vegetable sources. Understanding its composition is vital to devising effective cleaning methods tailored to its unique characteristics.
How Grease Accumulates on Kitchen Floors:
Grease in kitchens arises from various sources, including cooking activities, frying, and food preparation. As cooking oils become aerosolized, they settle on surfaces, contributing to the gradual buildup of grease. Factors such as inadequate ventilation, high cooking temperatures, and the type of cooking methods employed play significant roles in the accumulation of on kitchen floors.
The Consequences of Ignoring Grease:
Neglecting a greasy kitchen floor poses immediate safety risks, with the potential for slips and falls. In addition to these hazards, the long-term impact on the floor’s integrity is substantial. Grease can penetrate flooring materials, causing discoloration, degradation, and even structural damage over time. Regular cleaning not only ensures a safer kitchen environment but also preserves the longevity and quality of the flooring material, preventing costly repairs and replacements.
Tools of the Trade: Must-Have Cleaning Supplies
Commercial Degreasers:
Commercial degreasers are potent weapons in the battle against kitchen grease. These specialized cleaners are formulated to break down and dissolve stubbornly, providing a thorough and efficient cleaning solution. Brands like [Brand Name] and [Another Brand Name] offer effective degreasers suitable for various flooring types. When selecting a commercial degreaser, consider factors such as the flooring material, the severity of buildup, and any environmental considerations. Always follow the manufacturer’s instructions for optimal results, and test a small, inconspicuous area before widespread application.
DIY Cleaning Solutions:
For those who prefer a more eco-friendly and budget-conscious approach, DIY cleaning solutions can be just as effective. A simple mixture of white vinegar and water, or baking soda and warm water, can serve as powerful -fighting agents. Additionally, lemon juice and essential oils like tea tree or eucalyptus can add a pleasant fragrance while enhancing the cleaning power. These homemade solutions not only combat effectively but also minimize the use of harsh chemicals, contributing to a healthier indoor environment.
Essential Cleaning Tools:
Having the right tools is essential for efficient and thorough cleaning. Invest in quality microfiber mops, which are effective in capturing and lifting from surfaces without leaving streaks. Scrub brushes with sturdy bristles are indispensable for tackling stubborn stains, especially in grout lines. Steam cleaners provide a chemical-free option for deep cleaning, using hot steam to break down and lift from various flooring materials. These tools, when used in conjunction with appropriate cleaning solutions, ensure a comprehensive and successful cleaning process.
Step-by-Step Cleaning Guide
Preparation:
Remove Obstacles and Sweep:
Before diving into the cleaning process, clear the kitchen floor of any obstacles such as chairs, rugs, or movable appliances. Sweep the floor to remove loose dirt and debris, preventing them from hindering the cleaning process.
Ventilate the Area:
Adequate ventilation is crucial during cleaning to minimize exposure to cleaning fumes. Open windows and doors to promote air circulation, ensuring a safe and comfortable environment for the cleaning process.
Spot Cleaning:
Address Specific Grease Stains:
Identify and tackle specific stains promptly using targeted solutions. For tile and vinyl, a mixture of warm water and mild dish soap can be effective. On hardwood, use a specialized wood cleaner to avoid damage.
Targeted Solutions for Different Flooring Types:
Tailor your cleaning approach to the specific requirements of your flooring material. For tile, focus on grout lines and use a mild degreaser. Vinyl benefits from a mixture of vinegar and water. Hardwood requires a gentle touch, utilizing a cleaner specifically designed for wood surfaces.
Deep Cleaning:
The Process of Deep Cleaning:
For a thorough clean, employ a commercial degreaser or DIY solution. Apply the cleaner according to the manufacturer’s instructions or your homemade recipe. Allow it to sit for a few minutes to penetrate and break down the grease.
Using Degreasers Effectively:
When using commercial degreasers, follow the recommended dilution ratios and application methods. Use a scrub brush or microfiber mop to agitate the cleaner, focusing on high-traffic areas and -prone spots. For steam cleaners, follow the device’s instructions for optimal results.
Preventive Measures:
Suggestions for Preventing Future Grease Buildup:
Establish habits that prevent future accumulation. Regularly wipe down surfaces, especially near cooking areas. Use splatter guards when frying or cooking with oil to minimize airborne grease. Encourage family members or kitchen staff to be mindful of spills and clean them promptly.
Importance of Regular Maintenance:
Consistent maintenance is key to preventing buildup. Implement a regular cleaning schedule based on your kitchen’s needs and traffic. Periodically assess the condition of your flooring and address any issues promptly to avoid long-term damage.
By following this comprehensive guide, you’ll not only transform your greasy kitchen floor into a sparkling, hazard-free surface but also establish sustainable cleaning practices that contribute to the longevity and beauty of your flooring. Remember, a clean kitchen floor is not just a testament to hygiene; it’s an investment in the safety and aesthetic appeal of your home.
Troubleshooting and FAQs
Common Challenges:
Persistent Stains:
Address persistent stains by creating a paste of baking soda and water for tiles, or a mixture of vinegar and water for vinyl. Apply, let it sit, and scrub gently. For hardwood, use a specialized wood cleaner and a soft cloth. If stains persist, consult a professional for advice.
Lingering Odors:
Combat lingering odors by sprinkling baking soda on the floor and letting it sit overnight before sweeping or vacuuming. Consider placing bowls of activated charcoal or coffee grounds in the kitchen to absorb odors. Ensure proper ventilation to minimize trapped smells.
Troubleshooting Tips:
- For grout lines: Use an old toothbrush or a grout brush to target hard-to-reach areas.
- Grease buildup in corners: Use a mixture of warm water and vinegar for an extra cleaning boost.
Conclusion
Creating a -free kitchen floor is a rewarding journey that involves understanding your flooring, mastering the science of grease, and employing effective cleaning strategies. Armed with the right tools and knowledge, your kitchen floor can be transformed into a pristine space that not only enhances aesthetics but also ensures safety and hygiene. Consistent application of these tips will yield a spotless masterpiece, making your kitchen a delightful and inviting place for all your culinary adventures. Happy cleaning!